- /
- /
- /
- /
How to disable or uninstall Microsoft Teams
Microsoft Teams can be a great software program concerning chat and team management. It can also be super annoying if you are not using it since it starts automatically and pops up frequently. So, we are going to show you how to disable it or uninstall completely.
Disable Microsoft Teams option 1:
- Locate the purple Microsoft Teams icon in your notification area or system tray.
- Right-click it and select Settings
- Select Do Not Auto-Start Teams.
- Right-click the icon again and select “Quit.”

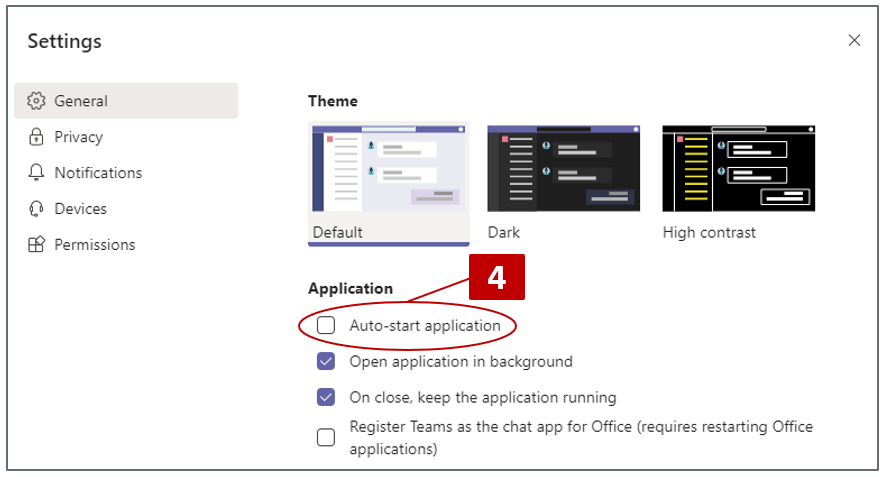
Disable Microsoft Teams option 2:
- Launch Microsoft Teams.
- Click on the Profile icon on the top right corner and click on Settings.
- Scroll down
- Clear the checkbox for Auto Start Application.
- Clear the checkbox for Open application in background
- Clear the checkbox for On close, keep the application running
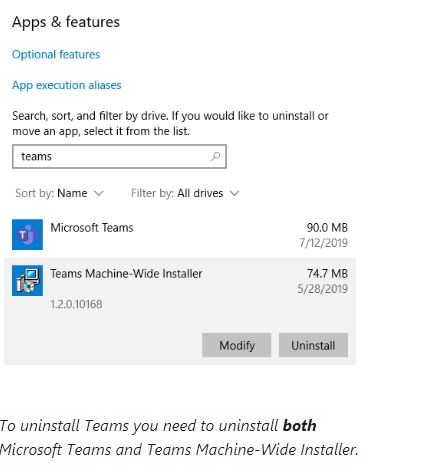
Uninstall Teams completely:
You need to uninstall two items for all users on a machine to fully uninstall Teams, so make sure you follow all the steps.
- Quit Teams by right-clicking the Teams icon in the taskbar and choosing Close window.
- In Windows, click on the Start button , > Settings > Apps.
- Under Apps & features, search “teams”.
- Highlight Microsoft Teams, then select Uninstall.
- A box will appear, then again select Uninstall to confirm. A new box will appear, asking Do you want to allow this app to make changes to your device? Select Yes.
- Now select Teams Machine-Wide Installer, click Uninstall. Then follow the same process described in step 5.